(c)エウシュリー
|
|---|
[edit] Navigation:
|
| General Info |
| Characters |
| Gameplay / General Tips |
| Walkthrough |
| Territories |
| Building |
| Formations |
| Quest |
Items
|
| FAQ |
| CG-Screen |
Basics[]
Lets start with the top left corner
Under the face, it say 領主: Lord's name, 首都: Town's name.
Lord provides Capital and Food income bonus equal to it's Politics value (in percents) multiplied by base city production.
In the city status screen there are 7 values. There are three categories, listed from top to bottom.
資金 Capital: Capital generated; Capital consumption.
兵糧 Food: Food generated; Food consumption.
その他 Others:
- 人口 Population - population increases Capital and Food consumed by 1% of total population, required for raising the level of the territory (see Territories).
- 環境 Environment - territories with high Environment value will attract population each turn, and territories with low Environment value will lose population each turn. The Environment value of each territory will change by up to 2 points each turn depending on the net Environmental value of all structures and trees in the territory. Strategy that increases population provides bigger bonus if Environment has high value.
- 耐久 Endurance - how damaged Walls inside the territory are. If walls are damaged it is possible to repair them, although cost does not depend on how damaged the Wall is. Also some damage is repaired automatically each turn.
On the Right bottom corner from top to bottom: Build, Upgrade/Repair, Dispose, World Map
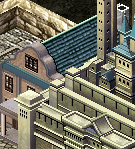
配置物 Buildings:
- There is four types of building: 自然 Nature, 任掛 Traps, 施設 Facility, and 他 Others
- There is five types of material: 鉱物 Mineral, 作物 Crops, 動物 Animal, 木材 Wood, 土壌 Soil
When you mouse over a territory in the world map it shows you the materials harvest-able from that area. The materials are listed in the order of drop rate from common (black color) to impossible (red). Resource building not only increase harvest material drop amount, but also their drop chance. Thus in order to get a particularly rare resource in large amounts, the player should build multiple resource buildings of the same type to harvest it.
Note you can find out how many of each materials you have at the information screen the fifth tab(物品). The seventh tab shows how many of each material you harvested the past turn.
Base/Landscape[]
| Base | Up Cost | Up Materials | 資金 Fund | 兵糧Food | 耐久(Forti) | Phy Def | Mag Def | Size | Notes | |
|---|---|---|---|---|---|---|---|---|---|---|
| Defense Base | -- | -- | -- | -- | 500 | 20 | 20 | 1x1 | ||
| Attack Base | -- | -- | -- | -- | 500 | 20 | 20 | 1x1 | ||
| 木橋 Bridge | -- | -- | -- | -- | 160 | 10 | 15 | 1x1 | Landscape | |
| Wall | -- | -- | ?? | ?? | 80 | 35 | 28 | 1x1 | Includes Gate | |
| Lvl2 | +900 | ?? | ?? | ?? | 160 | 40 | 32 | |||
| Lvl3 | +1,000 | ?? | ?? | ?? | 320 | 45 | 36 | |||
| Castle | -- | -- | ?? | ?? | 250 | 20 | 20 | 3x3 | Centakus Castle | |
| Lvl2 | +3,000 | ?? | +200 | -25 | 300 | 28 | 28 | |||
| Lvl3 | ?? | ?? | ?? | ?? | ?? | ?? | ?? | |||
Nature[]
|
自然 Nature |
Size | Build Cost | Materials | Unlock When | 兵糧Provisions | 環境Environ | Build Time | Dismantle Cost | Dismantle Materials |
|---|---|---|---|---|---|---|---|---|---|
| 木 A-P Tree | 1x1 | -100 | 1 Orange Fruit | --- | +2 | +1 | 1 | -50 | 1 Wood |
| 針葉樹 A-C Conifer | 1x1 | -150 | 1 Green Fruit | Clear Battle Scars | +3 | +1 | 1 | -50 | 2 Wood |
| 林 A-F Woods | 2x2 | -300? | 1 Blue Fruit | 10 Territory? | +10 | +2 | 2 | -100 | 2 Wood |
| 森 A-C Forest | 2x2 | -400? | 1 Yellow Fruit | 10 Territory? | +15 | +3 | 3 | -150 | 1 Strenghten Wood |
| 樹齢千年の巨大樹 Anicent Tree | ??? | --- | --- | --- | ??? | ??? | --- | ??? | ??? |
| 枯木A-D Wither Wood | 1x1 | --- | --- | --- | 0 | 0 | --- | -50 | 1 Wood |
| 枯木E | 2x2 | --- | --- | --- | 0 | 0 | --- | -50 | 1 Wood |
| 未成熟木A-D Small Tree | 1x1 | --- | --- | --- | +1 | 0 | --- | -50 | 1 Wood |
| 未成熟木E | 2x2 | --- | --- | --- | +1 | 0 | --- | ??? | ??? |
| 岩 A Rock | 2x2 | --- | --- | --- | 0 | 0 | --- | -150 | 2 Stone |
| 岩 B-K Rock | 1x1 | --- | --- | --- | 0 | 0 | --- | -50 | 1 Stone |
- Only Tree A, Conifer A, Woods A, and Forest A can be build, all others are unbuildable
- Rock and Wither Wood are totally useless. it doesn't do anything but takes up space, but once removed they can't be build.
Blockade and Traps[]
|
Blockade |
Cost | Materials | 耐久(Forti) | Phy Def | Mag Def | Size | Notes | |
|---|---|---|---|---|---|---|---|---|
| 木防柵Wood Fence | 200 | ?? | 20 | 24 | 24 | 1x1 | Include Left and Right | |
| Lvl2 | +100 | ?? | 40 | 32 | 32 | |||
| 鉄防柵Iron Fence | ?? | ?? | ?? | ?? | ?? | 1x1 | Left and Right | |
|
Trap |
Cost | Materials | ダメージDamage | 硬直Firm | Size | Remove Cost | Remove Material | Notes |
|---|---|---|---|---|---|---|---|---|
| 陥穽 Trap | 200 | ?? | 0 | 0 | 1x1 | 100 | ?? | trap, slows enemy movement |
| 虎挟み BearTrap | ?? | ?? | ?? | ?? | 1x1 | ?? | ?? | |
| まきびし Makibishi | 100 | ?? | 1 | 20 | 1x1 | 100 | ?? | trap, slows and damages enemies. |
All Blockade and Traps dont have build time
Facility[]
|
施設Facility |
Cost | Materials | 資金 Fund | 兵糧Food | 環境Environment | Build Time | Size | Require | Remove Cost | Remove Material | Notes | |
|---|---|---|---|---|---|---|---|---|---|---|---|---|
| 兵器研究所 Weapon Lab | 1,500 | ?? | -80 | -50 | -3 | 1 | 2x2 | None | 300 | ?? | +11兵器, +1兵器 for each building after first in territory | |
| Lvl2 | +1000 | ?? | -160 | -70 | -6 | -- | -- | -- | 400 | ?? | +17兵器, +2兵器 for each building after first in territory | |
| 魔術研究所 Magic Lab | 1,500 | ?? | -80 | -50 | -3 | 1 | 2x2 | None | 300 | ?? | +11魔術, +1魔術 for each building after first in territory | |
| Lvl2 | +100 | ?? | -160 | -70 | -6 | -- | -- | -- | 400 | ?? | +17魔術, +2魔術 for each building after first in territory | |
| ベルモンの斡旋所 Quest Hub | 1,000 | ?? | +100 | -20 | +1 | 1 | 2x2 | Start Quest #603 | 350 | ?? | Unlock Quest | |
| Lvl2 | +700 | ?? | +150 | -40 | +2 | -- | -- | -- | 400 | ?? | -- | |
| セーナル商会 Senaru Firm | 1,500 | ?? | +150 | -- | - | 2 | 2x2 | Start Quest #604 | 350 | ?? | Can buy and sell items. Each territory has different items available. | |
| Lvl2 | +600 | ?? | +250 | -- | +2 | -- | -- | -- | 400 | ?? | Unlocks More Item | |
| Lvl3 | +800 | ?? | +300 | -- | +3 | -- | -- | -- | 450 | ?? | ||
| Shop of Ragiru | 1,500 | +250 | - | - | 3 | 2x2 | can buy generals | |||||
|
リリエッタの娼館 Brothel |
1,000 | ?? | +200 | -30 | +1 | 1 | 2x2 |
Start Quest #602 |
350 | ?? | H-Scenes | |
| Lvl2 | +700 | ?? | +200 | -75 | +2 | -- | -- | -- | 400 | ?? | Trial Only H-Scenes | |
| 魔導巧殻研究所 Laboratory | 1,000 | ?? | -100 | -10 | -2 | 3 | 2x2 | Aru Join | 400 |
?? |
+11魔術, +1魔術 for each building after first in territory, can change equipment for Madou Koukaku | |
| Lvl2 | +600 | ?? | -125 | -15 | -4 | -- | -- | -- | 500 | ?? | +17魔術, +2魔術 for each building after first in territory, can change equipment for Madou Koukaku | |
Others[]
| No | 名称 (name) | 建
設 (build time) |
幅 (size) | 質 (level) | 階
級 (rank) |
性能 | 建築/増築 (build/upgrade) | |||||||||||
|---|---|---|---|---|---|---|---|---|---|---|---|---|---|---|---|---|---|---|
| 資金 (money) | 兵糧 (food) | 環境 (environment) | 収穫物 (harvest type/+chance/+amount) | 費用 (cost) | 材料1 (material 1) | 材料2 (material 2) | 材料3 (material 3) | |||||||||||
| 007 | 農園 (farm) | 1週 | 2×2 | 1 | E | -70 | +100 | +3 | 作物 (crop) | +5% | 600 | 木材 | 3 | ゴルオ土 | 3 | |||
| 2 | D | -80 | +110 | +3 | 作物 | +6% | +1回 | 1200 | 木材 | 8 | ゴルオ土 | 8 | ||||||
| 3 | C | -90 | +120 | +3 | 作物 | +7% | +1回 | 2000 | 木材 | 20 | ゴルオ土 | 20 | ||||||
| 4 | B | -100 | +130 | +3 | 作物 | +8% | +2回 | 4000 | 強化木材 | 10 | ボイル土 | 10 | ||||||
| 5 | A | -120 | +150 | +3 | 作物 | +10% | +2回 | 8000 | 強化木材 | 20 | ボイル土 | 20 | ||||||
| 008 | 大農場 (large farm) | × | 3×3 | 1 | S | -200 | +250 | +9 | 作物 | +3回 | ||||||||
| 009 | 畜産場 (ranch) | 1週 | 2×2 | 1 | E | -70 | +100 | +2 | 動物 (animal) | +5% | 600 | 木材 | 3 | 合成粘土 | 3 | |||
| 2 | D | -80 | +110 | +2 | 動物 | +6% | +1回 | 1200 | 木材 | 5 | 合成粘土 | 10 | ||||||
| 3 | C | -90 | +120 | +2 | 動物 | +7% | +1回 | 2000 | 木材 | 15 | 合成粘土 | 20 | ||||||
| 4 | B | -100 | +130 | +2 | 動物 | +8% | +2回 | 4000 | 強化木材 | 10 | ボイル土 | 15 | ||||||
| 5 | A | -120 | +150 | +2 | 動物 | +10% | +2回 | 8000 | 強化木材 | 20 | ボイル土 | 20 | ||||||
| 010 | 大牧場 (large ranch) | × | 3×3 | 1 | S | -200 | +250 | +8 | 動物 | +3回 | ||||||||
| 011 | 採石場 (quarry) | 1週 | 2×2 | 1 | E | +50 | -20 | -2 | 鉱石 (ore) | +1% | 700 | 石材 | 3 | ドルイ土 | 2 | |||
| 2 | D | +60 | -25 | -2 | 鉱石 | +2% | +1回 | 1400 | 石材 | 5 | ドルイ土 | 10 | ||||||
| 3 | C | +70 | -30 | -2 | 鉱石 | +3% | +1回 | 2500 | 石材 | 20 | ドルイ土 | 15 | ||||||
| 4 | B | +80 | -35 | -2 | 鉱石 | +4% | +2回 | 5000 | 強化石材 | 10 | グレイ土 | 12 | ||||||
| 5 | A | +100 | -40 | -2 | 鉱石 | +5% | +2回 | 10000 | 強化石材 | 18 | グレイ土 | 26 | ||||||
| 012 | 巨大採石場 (large quarry) | × | 3×3 | 1 | S | +200 | -100 | -6 | 鉱石 | +3回 | ||||||||
| 013 | 鉱山 (mine) | 2週 | 2×2 | 1 | E | -100 | -50 | -5 | 鉱石 | +10% | 1000 | 強化石材 | 6 | 錬成粘土 | 5 | 合成粘土 | 3 | |
| 2 | D | -110 | -55 | -5 | 鉱石 | +15% | 2000 | 強化石材 | 10 | 錬成粘土 | 10 | 合成粘土 | 8 | |||||
| 3 | C | -120 | -60 | -5 | 鉱石 | +20% | 4000 | 強化石材 | 15 | 錬成粘土 | 15 | 合成粘土 | 15 | |||||
| 4 | B | -130 | -65 | -5 | 鉱石 | +25% | 8000 | 良質石材 | 8 | 硬化粘土 | 12 | 錬成粘土 | 15 | |||||
| 5 | A | -150 | -75 | -5 | 鉱石 | +30% | 16000 | 良質石材 | 15 | 硬化粘土 | 15 | 錬成粘土 | 20 | |||||
| 014 | 巨大鉱山 (large mine) | × | 3×3 | 1 | S | -180 | -90 | -15 | 鉱石 | +50% | ||||||||
| 015 | 採土場 (mud pit) | 1週 | 2×2 | 1 | E | +50 | -20 | 土 (soil) | +5% | 600 | 石材 | 3 | 合成粘土 | 3 | ||||
| 2 | D | +60 | -25 | 土 | +6% | +1回 | 1200 | 石材 | 10 | 合成粘土 | 10 | |||||||
| 3 | C | +70 | -30 | 土 | +7% | +1回 | 2000 | 石材 | 25 | 合成粘土 | 25 | |||||||
| 4 | B | +80 | -35 | 土 | +8% | +2回 | 4000 | 強化石材 | 18 | 錬成粘土 | 20 | |||||||
| 5 | A | +100 | -40 | 土 | +10% | +2回 | 8000 | 強化石材 | 25 | 錬成粘土 | 35 | |||||||
| 016 | 巨大採土場 (large mud pit) | × | 3×3 | 1 | S | +200 | -100 | 土 | +3回 | |||||||||
| 017 | 伐採場 (lumber yard) | 1週 | 2×2 | 1 | E | +50 | -20 | -1 | 木材 (wood) | +5% | 600 | 石材 | 2 | 木材 | 2 | ドルイ土 | 2 | |
| 2 | D | +60 | -25 | -1 | 木材 | +6% | +1回 | 1200 | 石材 | 12 | 木材 | 5 | ドルイ土 | 10 | ||||
| 3 | C | +70 | -30 | -1 | 木材 | +7% | +1回 | 2000 | 石材 | 20 | 木材 | 15 | ドルイ土 | 20 | ||||
| 4 | B | +80 | -35 | -1 | 木材 | +8% | +2回 | 4000 | 良質石材 | 10 | 強化木材 | 10 | グレイ土 | 15 | ||||
| 5 | A | +100 | -40 | -1 | 木材 | +10% | +2回 | 8000 | 良質石材 | 15 | 強化木材 | 15 | グレイ土 | 20 | ||||
| 018 | 巨大伐採場 (large lumber yard) | × | 3×3 | 1 | S | +200 | -100 | -3 | 木材 | +3回 | ||||||||


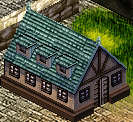
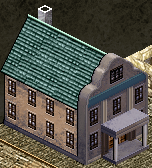
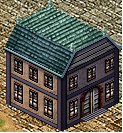
- For those who wonder, The only House that can be build are House A,B,C of each Nation.
- (Elf tribe) house, only Eren House A, B can be build. Eren House C-F can't be build.
Well the English name of the building in the game is kind of long so here they are if anyone is interested.
- Castle - 城内 - Castle
- Weapon Research - -
- Magic Research - -
- Mag-Tech Research - - Laboratory
- Quest Hub - ベルモンの斡旋所 - Mediation Offices of Berumon
- Merchant - セーナル商会 - Senaru Firm
- Brothel - リリエッタの娼館 - Prostitute Mansion of Ririetta
Trial Data
|
自然 Nature |
Size | Build Cost | Materials | Building Requirement | 兵糧Provisions | 環境Environment | Build Time | Dismantle Cost | Dismantle Materials | Notes | |
|---|---|---|---|---|---|---|---|---|---|---|---|
| 木A Tree | 1x1 | 100 | 1 O. Fruit | -- | 2 | 1 | 1 | 50 | 1 Wood | There is 16 Different Types of Trees | |
| 木B | 2 | 1 | |||||||||
| 林 Wood | 2x2 | 300 | ?? | 100 environment | 10 | 2 | 2 | 200 | 2 Wood | 6 Types | |
| 森 Forest | 2x2 | 400 | ?? | 100 environment | 15 | 3 | 3 | 300 | ?? | 3 Types | |
| 岩 Rock | 1x1 | ?? | ?? | ?? | ?? | -1 | ?? | 100 | ?? | 6 Types | |
| 岩 Rock | 2x2 | ?? | ?? | ?? | ?? | -1 | ?? | 400 | ?? | 1 Types | |
| 荒れ地 Waste Land | ?? | ?? | ?? | ?? | -- | -?? | ?? | ?? | ?? | Drop Environment | |
| 草原 Plain | ?? | ?? | ?? | ?? | -- | +?? | ?? | ?? | ?? | Plus Environment | |
| 針葉樹 Conifer | 1x1 | ?? | ?? | ?? | 8 | ?? | ?? | 50 | ?? | 3 Types | |
Others - buildings[]
- Learning institutions (number 22-34, except no. 24) is a type of building that unlocks unit skills. Before the skills are learnt, the skill will be greyed out in the unit window with the words 未習得. Several turns after the learning institution is constructed a star event will appear over it saying that you can now buy the Report of Training in Senaru's Firm and the building has no further use. The building can then be demolished, although some provide enough benefits on their own to be worth having around. The Report is what unlocks the skills. More of the same learning institution speed up time required to get the report. Some reports may require higher levels of Senaru's Firm.
- Medical facilities (no. 23) only become available after Marugiretta (マルギレッタ) joins, either the Orfan or Eida routes is chosen, and having more than 30 active units.
- Command post (no. 24) is a tough residential building found in some forts and towns. There is nothing special about it save that it can survive attacks better than normal houses.
- Clean fountain (no. 35) is the most space efficient building for improving environment. It also provides a larger boost to crop material chance than farms. Building 5 of them unlock the Pegasus cavalry. You get it after acquiring Mei Mei (メイメイ) and having more than 20 territories.The 澄み切った水 (perfectly clear wather) required for buil it can be harvested from the Capital Harenlarma and the Gau length castle fort.
- Watchtowers (no. 36-37) can generally be demolished. They are said to be able to detect invisible units, but invisible units can be detected by the dust animation they leave behind when they move, and can be attacked just like any normal unit.
| No | 名称 (name) | 建 設 (build time) |
幅 (size) | 質 (level) | 階 級 (rank) |
性能 | 建築/増築 (build/upgrade) | ||||||||||||||
|---|---|---|---|---|---|---|---|---|---|---|---|---|---|---|---|---|---|---|---|---|---|
| 魔術 (magic research) | 兵器 (arms research) | 資金 (money) | 兵糧 (food) | 人口 (population growth) | 環境 (environment) | 収穫物 (harvest type/+chance/+amount) | 費用(cost) | 材料1 (material 1) | 材料2 (material 2) | 材料3 (material 3) | |||||||||||
| 019 | 造兵廠 (arms factory) | 2週 | 2×2 | 1 | E | +1(+1) | +250 | -100 | -10 | 1000 | 強化石材 | 8 | 強化木材 | 5 | 錬成粘土 | 3 | |||||
| 2 | D | +2(+1) | +275 | -115 | -10 | 2000 | 強化石材 | 15 | 強化木材 | 8 | 錬成粘土 | 8 | |||||||||
| 3 | C | +3(+1) | +300 | -130 | -10 | 4000 | 強化石材 | 30 | 強化木材 | 15 | 錬成粘土 | 12 | |||||||||
| 4 | B | +4(+2) | +325 | -145 | -10 | 8000 | 良質石材 | 12 | 良質木材 | 8 | 硬化粘土 | 10 | |||||||||
| 5 | A | +5(+3) | +350 | -150 | -10 | 16000 | 良質石材 | 25 | 良質木材 | 15 | 硬化粘土 | 18 | |||||||||
| 020 | 巨大造兵廠 (large arms factory) | × | 3×3 | 1 | S | +8(+1) | +500 | -200 | -20 | ||||||||||||
| 021 | ドワーフ工房 | 4週 | 2×2 | 1 | A | +600 | -300 | -15 | 3000 | 最高級石材 | 8 | 赤魔法石 | 5 | 茶魔法石 | 5 | ||||||
| 022 | 学舎 (school) | 3週 | 2×2 | 1 | D | +50 | -100 | 1000 | 石材 | 6 | 木材 | 2 | 錬成粘土 | 2 | |||||||
| 023 | 医療施設 (medical facilities) | 4週 | 2×2 | 1 | B | +200 | -200 | +10 | 2500 | 高級石材 | 10 | 良質木材 | 5 | 綺麗な水 | 5 | ||||||
| 024 | 武将詰所 (command post) | 1週 | 2×2 | 1 | E | -30 | +35 | 800 | 石材 | 3 | 木材 | 2 | 合成粘土 | 2 | |||||||
| 025 | 武将募集所 | 2週 | 2×2 | 1 | E | -10 | 800 | 石材 | 5 | 木材 | 5 | 勲章 | 1 | ||||||||
| 026 | 魔物捕獲所 | 2週 | 2×2 | 1 | E | +10(+1) | -20 | -1 | 1000 | コルシノ鋼 | 10 | 錬成粘土 | 8 | 勲章 | 1 | ||||||
| 027 | 剣術訓練所 (sword training ground) | 2週 | 2×2 | 1 | D | -30 | 1000 | 強化石材 | 4 | 強化木材 | 6 | ゴルオ土 | 3 | ||||||||
| 028 | 弓兵訓練所 (archery range) | 2週 | 2×2 | 1 | D | -30 | 1000 | 強化石材 | 5 | 強化木材 | 5 | ドルイ土 | 3 | ||||||||
| 029 | 射撃演習場 (shooting range) | 2週 | 2×2 | 1 | D | -30 | 1000 | 強化石材 | 7 | 強化木材 | 3 | ドルイ土 | 3 | ||||||||
| 030 | 工兵育成所 (engineer training ground) | 2週 | 2×2 | 1 | C | -50 | 1200 | 強化石材 | 8 | 強化木材 | 8 | 合成粘土 | 2 | ||||||||
| 031 | 外交官育成所 (diplomat training ground) | 2週 | 2×2 | 1 | C | -50 | 1200 | 強化石材 | 8 | 強化木材 | 10 | 硬化粘土 | 2 | ||||||||
| 032 | 武具開発研究所 (armor lab) | 2週 | 2×2 | 1 | C | -80 | -2 | 2300 | 良質石材 | 8 | 良質木材 | 5 | グレイ土 | 5 | |||||||
| 033 | 特殊技術研究所 (special tech lab) | 2週 | 2×2 | 1 | C | -80 | -2 | 2300 | 良質石材 | 10 | 良質木材 | 10 | ゴルオ土 | 5 | |||||||
| 034 | 必殺技研究所 (special move lab) | 2週 | 2×2 | 1 | C | -80 | -2 | 1200 | 良質石材 | 6 | 強化木材 | 12 | 錬成粘土 | 2 | |||||||
| 035 | 清浄な泉 (clean fountain) | 5週 | 2×2 | 1 | A | -180 | +15 | 作物 | +15% | +1回 | 2000 | 良質石材 | 5 | 澄み切った水 | 5 | ||||||
| 036 | 物見櫓 (wooden watchtower) | 1週 | 1×1 | 1 | D | 200 | 木材 | 2 | |||||||||||||
| 037 | 物見塔 (stone watchtower) | 1週 | 1×1 | 1 | D | 400 | 強化石材 | 4 | |||||||||||||