April 28 2016 00:00:00 +0900 left before Sankai Ou no Yubiwa is release!
Go get the game! Shop NOW!!!
Patch will include:
- Amudusias makes an appearance
- Approximately 40 New enemies
- High End Arena (Contains 15 battles)
- 70 New Items
- Level cap increased by 50 (Max 250)
- Enemy strength starting at 1.5x up to 5.x (Eushully put a disclaimer saying this feature is not supported)
- Amudusias and Shuverutoraite can be summoned
Side Note: After Arena Battle #2, the original safe file (Not the one for the entire guide) was used. Overkill ability and other important abilities are required for the high end content.
Arena Battle General Information[]
- It is almost required to engage in Arena Battle in second playthrough and beyond.
- There are a total of 15 Arena Battles: 5 Bronze, 5 Silver, and 5 Gold.
- All Arena battles must be done in order that is presented.
- All battles contain no restrictions.
- All bosses start with Max FS.
- It's also recommended to reload the game if you lose a battle as consumables will be used even when the battle is lost.
- Goddess Gauge goes down by 200 per battle lost.
- Preview of the boss also contains a hint (Figured it may not be obvious for non Japanese speakers)
- It is strongly recommended to take on the later challenges at really high levels.
- Stacking evasive items is no longer an effective strategy due to enemy's intense high hit rating.
Bronze Arena Battles[]
Battle #1 - Majin Ronoui
Hint: High Magical Attack and Defense, Low Physical Attack and Defense. Characters with more magic defense are effective.
This Majin is rather simple. He is a legitimate 100% caster. This means that the battle is simple. Penetration effects does not work on the boss. Because of his last innate skill, he will continue to cast because he will never run out of mana, which trivializes the fight entirely, making him a freebie.

Battle #2 - Majin Asutaroto
Hint: Majin that can perform additional attack, but is weak against magic.
This Majin can be simple or not. However, there are two things that is critical: Additional Attack V and his 14 second cast ability casts petrification. This means any of his attacks have a 25% chance to perform an additional attack although I have never seen him cast the 5x5 darkness spell back-to-back. It's definitely recommended to defend for the 14 second physical attack ability. The accessory to nullifies petrification is mandatory. I did this boss with Refin alone as the others are all going to die and just waste time. Penetration works on this boss. Here are the boss abilities:
- 6 second cast / 5 second delay - 1x1 Physical Attack (Weak)
- 3 second cast / 5 second delay - 3x3 Lightning Attack
- 5 second cast / 5 second delay - 5x5 Magic Attack (Weak)
- 15 second cast / 10 second delay - 5x5 Darkness Magic
- 4 second cast / 3 second delay - 3x3 Physical Attack
- 14 second 8 second delay - 5x5 Physical Attack and causes Petrified status.

Note: Battles moving forward will be using a different save with higher levels. Levels will be gained accordingly to defeat the boss.
Battle #3 - Majin Doridarafu
Hint: The three heads contains each element. Kill the heads early will be advantageous.
This Majin is ridiculously hard, for low levels. The Majin has two healing abilities that revives the other three heads; first ability revives a single head, and the other revives all the head. The heads have to die at the right time in a way but it is not that important if you just out level the boss. This way, you are forcing the Majin to be on the defensive side though his abilities aren't so deadly. Killing the heads too fast (Not for me) can cause him to heal all the heads back up, therefore giving him the edge again. Each head has its own element: Ice, Fire, Earth and they all have a 5x5 AOE physical attack type breath. It is extremely deadly if all three of them decides to cast the breath ability. Finally, Piercing attacks do not work on this boss or any of its heads.
My setup consists of Eushully-chan soloing attacking while the other four outlast the battle by using items. No buffs were done due to Shuri drops almost for the majority of the battle. Last thing, Penetration attacks do not work against the boss.
Main Boss
- 6 second cast / 3 second delay: AOE Breath (Fire)
- 10 second cast / 6 second delay: 3x3 Physical Attack
- 6 sceond cast / 3 second AOE Breath Physical
- 3 second cast / 1 second delay: Single target Light Magic
- 3 second cast / 1 second delay: Single target Dark Magic
- 10 second cast / 5 second delay: Revive on a single Head
- 5 second cast / 5 second delay: Revive all heads
Fire Head
- 7 second cast / 4 second delay: Single target Physical Attack
- 6 second cast / 5 second delay: Single target Physical Attack
- 5 second cast / 4 second delay: Change to inflict all debuffs
- 9 second cast / 8 second delay: Fire Magic Breath AOE
Ice Head
- 7 second cast / 4 second delay: Single Physical Attack
- 6 second cast / 5 second delay: Single target Physical Attack
- 13 second cast 8 second delay: Ice Magic Breath AOE
- 2 second cast / 2 second delay: AOE FS Reduction
Earth Head
- 7 second cast / 4 second delay: Single Physical Attack
- 6 second cast / 5 second delay: Single target Physical Attack
- 9 second cast / 8 second delay: AOE Earth Breath
Battle #4: This isn't a Majin but a beast (Trivia: He also appears in Battle Goddess 2 as an optional boss in Chapter 11, with the exact same defense element)
Hint: Once a certain period passes, it will perform a strong attack. It's recommended to use characters with interrupt ability and end the fight early.
First thing, his defense element is anti-versatile, so make sure weapons are changed if versatile weapons are being used. Stack Piercing abilities to make the fight go faster.
This boss can either be very easy or very difficult, and it really boils down to whether or not his destructive ability kills your entire party or not. For those that are having issues, I suggest level up or increase defense frequency. The issue with this boss is that interrupt abilities do not really exist in this game. The only reliable ability in the game is Celica's guaranteed interrupt ability that has a 11 cast time and a 24 second delay. If you manage to interrupt the boss, he will have a 5 second delay and simply cast the same ability again, therefore just making it impossible for Celica to interrupt it again. Another option is to stack Cowra/Roka with chance to interrupt ability. Cowra has 25% chance and Roka has 15% (With given summoning stones up to this point in the game). It is still too RNG and risky. It is unclear on how this boss is handled on higher difficulties. His abilities are as follows:
- 10 second cast / 4 second delay: 3x3 Physical Attack
- 19 second cast / 24 second delay: Ice 5x5 Magic Attack
- 15 second cast / 2 second delay: Self buff Attack 5 and Frequency 5 for 200 seconds
- 15 second cast / 20 second delay: 5x5 Laser attack (No Element, Physical) -- Deadly
- 7 second cast / 5 second delay: 1x1 physical attack
Look carefully at Celica's ability and the boss ability. It's ideal to do it like that.
Battle #5: Majin Amudoshias
Hint: Likes to perform area effect attacks. It's wise to defense when she performs such abilities.
She is definitely the second easiest of the fights so far, yet is the most annoying fight in the entire game. Her evasive ability is arguably the highest in the game, surpassing Kuchua and Rudon. Other than that, she isn't too difficult. Piercing attacks do not work against her. Also, be aware of her additional attack 5 ability. It can be executed with any of her abilities. Her abilities are listed below:
- 5 second cast / 7 second delay 3x1 Darkness
- 5 second cast / 7 second delay 1x3 Versatile Laser
- 3 second cast / 5 second delay 3x3 Lightning
- 8 second cast / 6 second delay 5x5 Physical
- 5 second cast / 5 second delay 1x1 Physical Attack
- 7 second cast / 5 second delay 1x3 Laser Beam (Not magic attack)
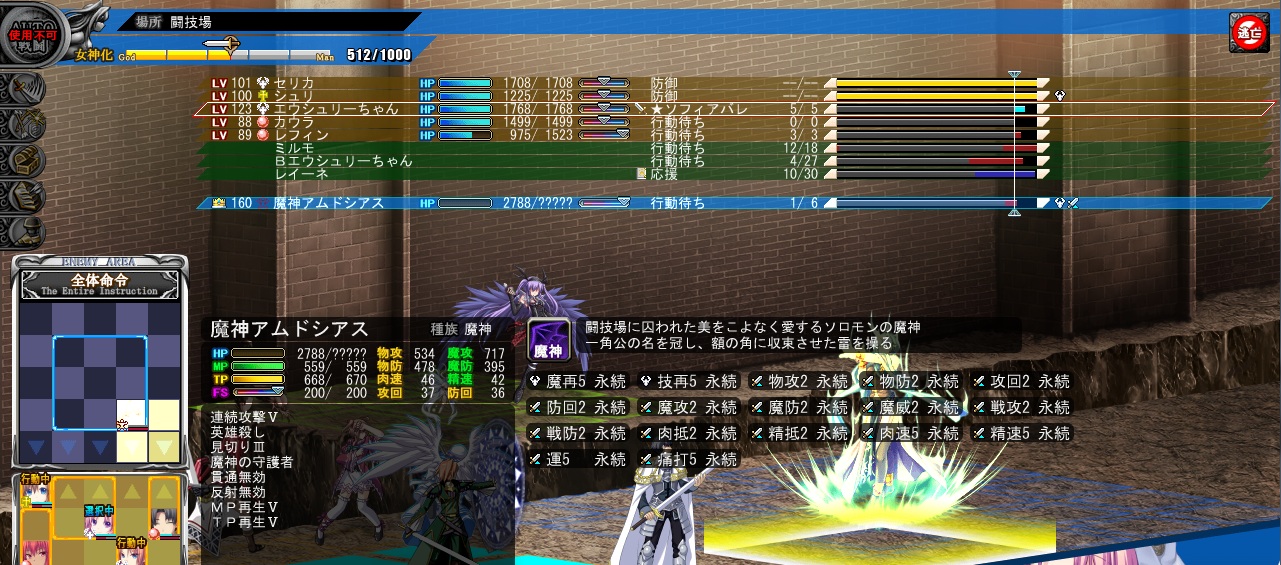
Upon her defeat, there will be a short scene and the first H-scene will trigger. This will unlock the Silver Arena Battles and the Patch 2.0 Dungeon. She will now be a summonable character unit with her character portrait unlocked: +10 to level cap.
Silver Arena Battles[]
General Note: Penetration Attacks work against all bosses.
Battle #6: Black Winged Killer Angel (黒翼の殺戮天使)
Hint: Boss has very high attack power and anti-death ability. Characters that have anti-death or high defense is recommended.
This fight is actually not difficult. All his attacks are either physical or darkness element, so putting the right element makes the fight overall not difficult. Putting anti-death accessory negates one of his abilities completely. He can perform piercing attacks on players, but the same goes for him, so stacking piercing helps. Boss abilities:
- 6 second cast / 6 second delay: 5x5 Lower Speed Frost Debuff
- 6 second cast / 5 second delay: 3x1 Physical attack
- 8 second cast / 6 second delay: 5x2 Physical attack
- 8 second cast / 5 second delay: 5x5 Instant Death attack (No effect if you have anti-accessory equipped)
- 14 second cast / 3 second delay: 5x5 Darkness Spell with chance to inflict lower cast/attack speed debuff

Battle #7: 琉璃の獣祈祷師
Hint: Very high defense. It's recommended to have attackers with high frequency (Meaning Physical, because Magic does not use frequency as a damage formula).
This boss is just as easy as the previous one. I auto-attacked the majority of the battle until he ran out of mana. It's a little unusual why this boss has TP Recovery 5, but not MP Recovery 5, but he's still very easy. His abilities are as follows:
- 5 second cast / 4 second delay: Single target with chance to inflict instant death
- 6 second cast / 7 second delay: 5x5 Fire magic breath
- 4 second cast / 6 second delay: 5x5 Wind
- 3 second cast / 5 second delay: 3x1 Darkness Wall
- 7 second cast / 5 second delay: 1x1 Physical Attack

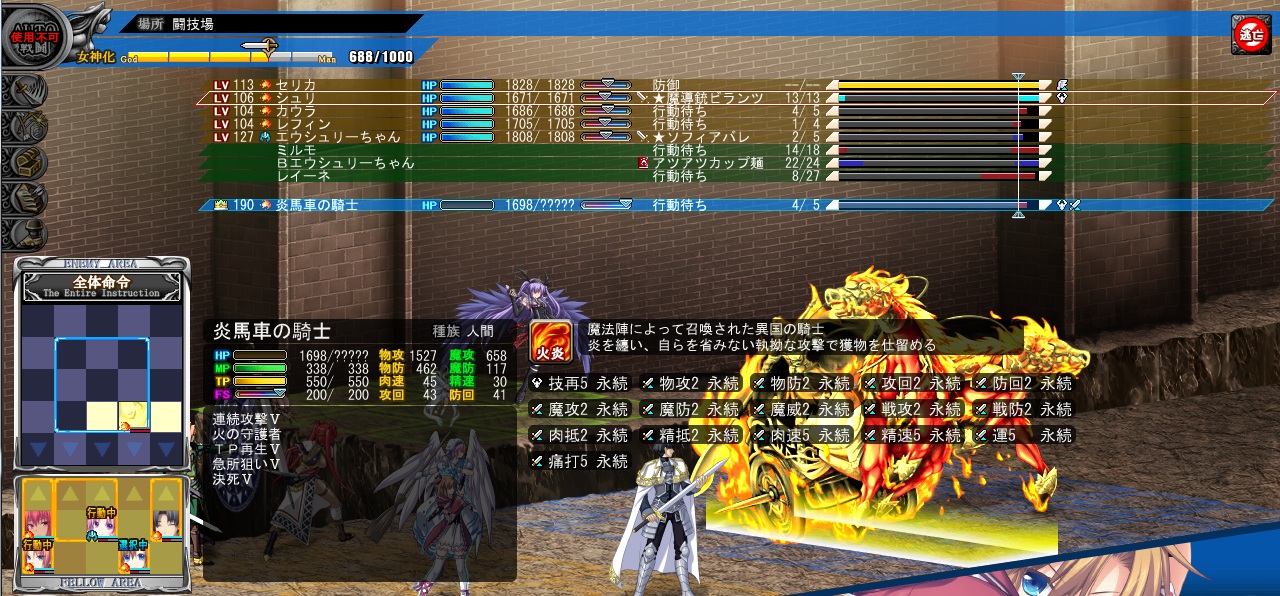
Battle #8: Knight of Flame Wagon
Hint: Very high offensive power, but weak on magic defense.
This boss isn't hard, but it's long, especially for low levels. The reason is because any of his abilities can easily be recovered through the use of items, and his 5x5 ability is fire based, so it will heal you if you put on a fire element armor. He will increase attack and defense the lower his health. Make sure you stack piercing attacks. His evade rate is on par with the annoying ones, so equip your melee with accuracy accessory.
- 8 second cast / 6 second delay: 3x1 Frost (Card Usage)
- 6 second cast / 5 second delay: 1x3 Physical (Fire Based Physical Attack)
- 7 second cast / 3 second delay: 2x3 Physical Attack
- 9 second cast / 8 second delay: 5x5 Fire Breath attack
Battle 9: Madman Rafaneru
Hint: Very high speed magical attack and high magical defense. Characters that can nullify buffs are effective.
This boss is a joke. The boss has a lot of fast attacks, but if you are immune to magic, it does 0 damage to you anyway. All his targets are single target, and he likes to buff himself for some unknown reason when the buff isn't even faded yet.
- 8 second / 1 second delay: Self buff Magic Attack and Power for 200 seconds.
- 3 second / 1 second delay: 1x1 Single Target Wind Magic attack
- 3 second / 1 second delay: 1x1 Single target Fire Magic Attack
- 3 second / 1 second delay: 1x1 Single target Earth Magic Attack
- 3 second / 1 second delay: 1x1 Single target Frost Magic Attack

Battle #10: Majin Harufasu
Hint: Very high physical and magic attack, but very weak on all defense. It's recommended to have characters with high attack power.
The hint makes sense, because this boss is easily one of the ones that contain the highest attack and defense frequency, hence, high attack power can offset it. He has Innate Death 5, so Anti Death accessory becomes mandatory. Because of his weak defense, this boss drops fast. The dangerous ability from the boss is the 5x5 Wind ability (No Wind element), and the rest of the abilities can easily be recovered through items. Because he has no other 5x5 abilities that can kill the party, therefore he's not difficult.
- 6 second cast / 3 second delay: 1x3 Physical Attack
- 6 second cast / 5 second delay: 3x3 Physical Attack
- 6 second cast / 3 second delay: 5x5 Wind Magic Attack
- 7 second cast / 3 second delay: 1x1 Physical Attack
- 6 second cast / 7 second delay: 1x3 Versatile Magic Attack

Gold Arena Battles[]
General Note: Penetration Attack works against all bosses.
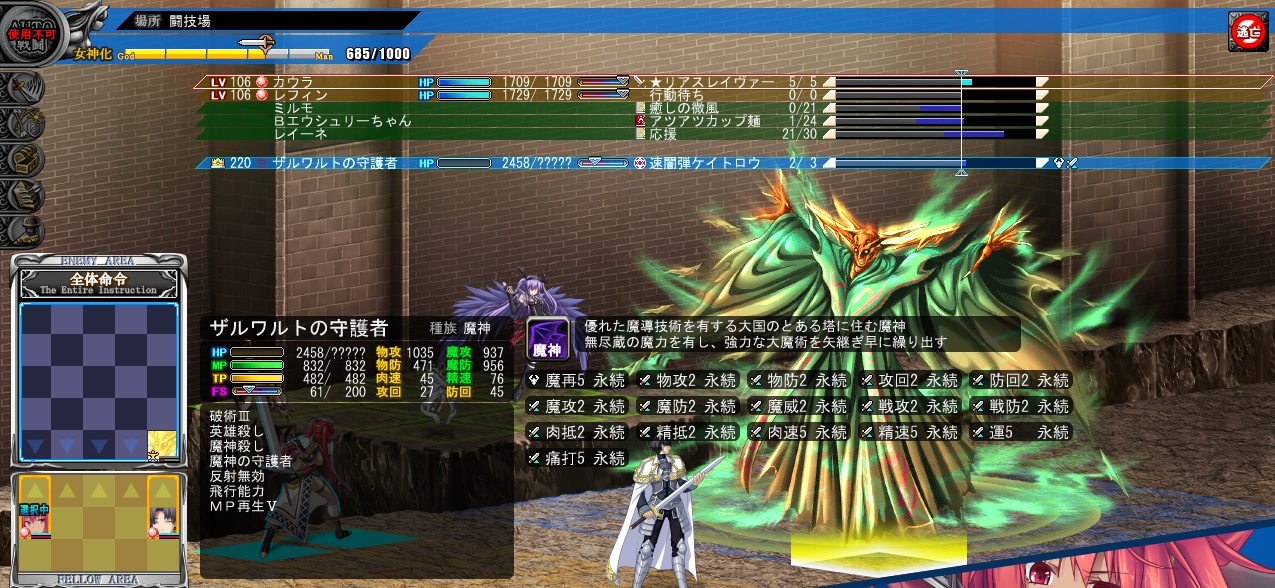
Battle #11: Guardian Zaruwarudo (Trivia: He is also a guardian for one of the treasure chests in an tower for Battle Goddess 2. This area is optional.)
Hint: Specializes in Holy and Darkness magic. High magic defense, so it's best to attack him with high damaging physical abilities.
Cowra + Refin + Auto Battle = Win. Joke. Not kidding. He's like a higher HP version than the first boss. His most dangerous ability is his 6 second 1x1 physical attack.
- 3 second cast / 1 second delay: 1x1 Single Target Holy Magic attack
- 3 second cast / 1 second delay: 1x1 Single target Holy Magic Attack
- 14 second cast / 3 second delay 5x5 Versatile Magic Attack
- 6 second cast / 5 second delay: 5x5 Holy Magic Attack
- 14 second cast / 3 second delay 5x5 Darkness Magic Attack
- 6 second cast / 3 second delay 1x1 Physical Attack
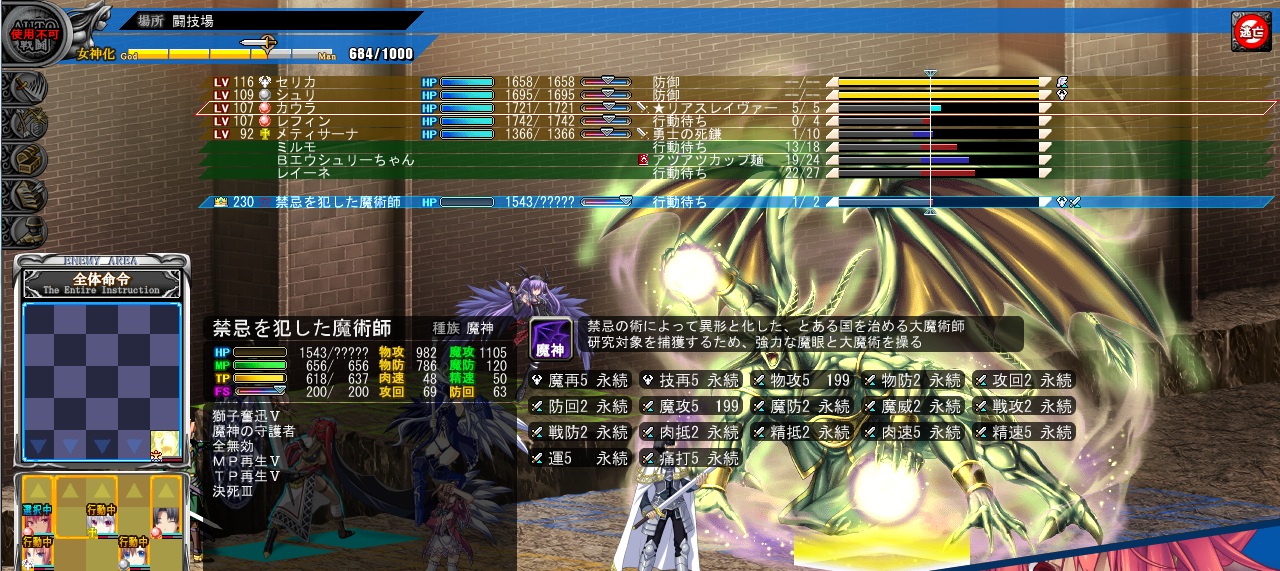
Battle #12: 禁忌を犯した魔術師
Hint: Tends to debuff and buff. It is wise to attack him with magic.
This fight is extremely long, but it isn't hard or anything abnormal or new. He doesn't do anything devastating, so it's an endurance fight. He does like to buff himself a lot.
- 5 second cast / 4 second delay: Chance to inflict all types of debuff
- 10 second cast / 4 second delay: 3x3 Physical Attack
- 14 second cast / 8 second delay: 5x5 Darkness Magic Attack
- 15 second cast / 2 second delay: Self buff Magic and Attack 5
- 7 second cast / 4 second delay: 1x1 Physical Attack
- 14 second cast / 3 second delay: 5x5 Versatile Magic Attack
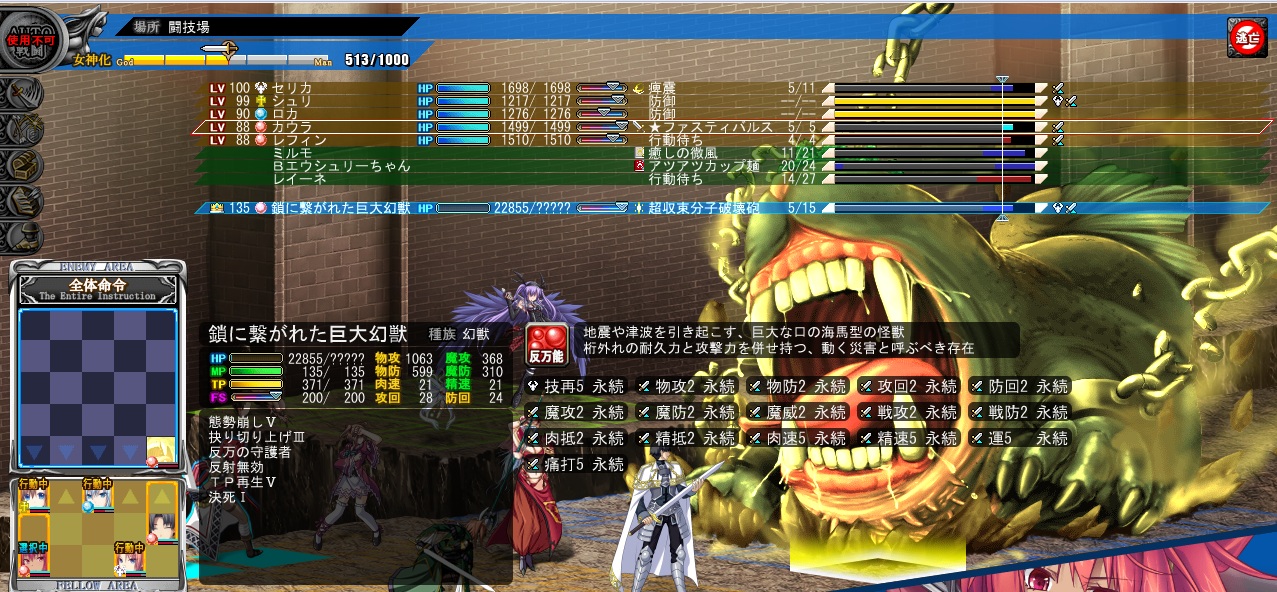
Battle #13: 哭璃の簒奪者 (Trivia: This beast model is seen in Battle Goddess 2.)
Hint: His attacks are deadly. Characters with high defense frequency and rating is recommended.
This fight is even longer than the previous fight due to high HP and his high defense values. However, this does not mean this fight is diffuclt. He has two deadly abilities: 5x5 Physical Fire Breath and a 5x5 Magic Darkness attack. Both can be negated depending on the character, which makes the fight completely doable using the setup below. This fight is just long, not hard. Boss abilities:
- 9 second cast / 8 second cast: 5x5 Fire Breath Attack
- 8 second cast / 4 second delay: 3x1 Physical Attack
- 15 second cast / 2 second delay: Self buff with Physical and Magic Attack 5
- 6 second cast / 7 second delay: 1x1 Darkness Magic Attack
- 14 second cast / 7 second delay: 5x5 Darkness Magic Attack

Battle #14: Evil God Rabura (Trivia: This boss is the 2.0 End Boss for Battle Goddess VERITA and the 99th floor boss for the Optional Dungeon in Battle Goddess 2)
Hint: Very low defense and high attack. Characters with all out attacks are recommended (Not sure what all out attack means)
Even though his defense is low, and he takes harder hits, but this fight does not necessarily mean it goes faster. The reason to this is because the combination of his abilities makes him a deadly boss, as it will be hard to mitigate all types of element of abilities at the same time in higher end difficulties. So certain characters being strong against one type of attack where recovery can be performed is the best way to go. The Darkness Physical Breath is a gear check. If one of the characters can hold the damage while defending or not, then the fight is pretty much yours, as the other abilities can be negated through other means. For me, Refin was stacked with max defense frequency in order to not die from the breath attack; Cowra is immune to all damage; Shuri/Eushully is immune to the Earth Attack and Celica could be given an Earth Element armor, and is piercing attacks do some damage. Boss abilities:
- 9 second cast / 8 second delay: 5x5 Physical Darkness Breath Attack
- 4 second cast / 4 second delay: 1x1 Physical Attack
- 3 second cast / 5 second delay: 3x3 Darkness Magic Attack
- 14 second cast / 3 second delay: 5x5 Darkness Magic Attack
- 14 second cast / 3 second delay: 5x5 Earth Magic Attack
- 6 second cast / 3 second delay: 5x5 Physical Earth Attack (Can be negated by flying units)

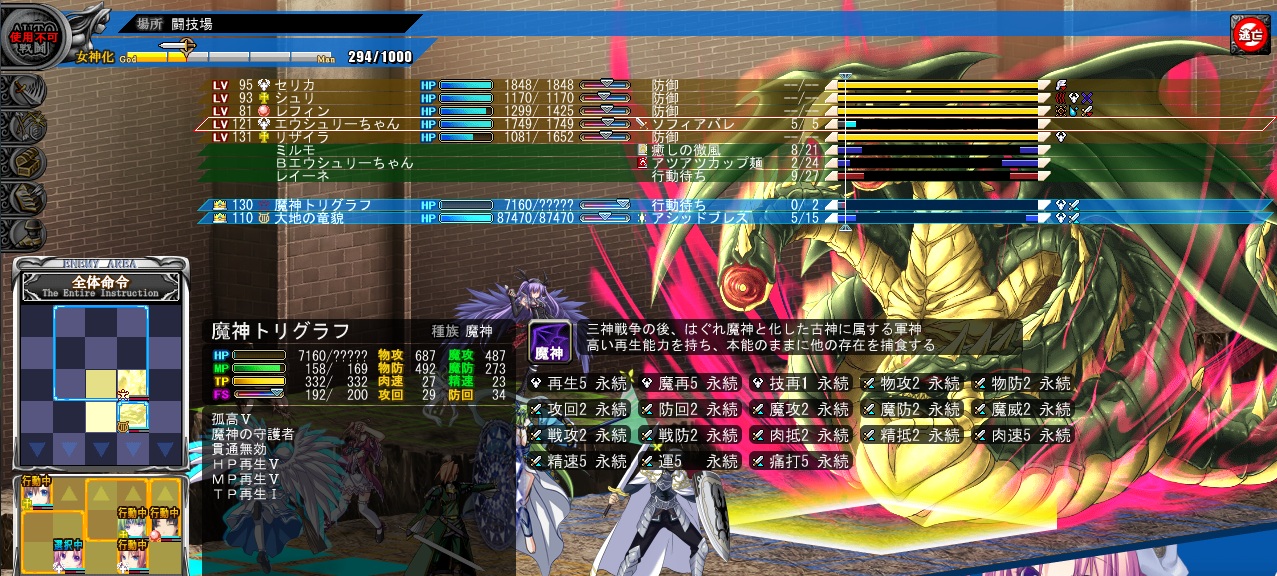
Battle #15: Evil Dragon Arakeru (Trivia: This boss is the final boss in the true route for Battle Goddess VERITA)
Hint: Well rounded Evil Dragon. It's wise to defeat the other parts first.
When engaging the battle, the music that is played will be the EN (IMO, it's the best piece in the whole OST). This boss is significantly harder than the other bosses by a very large margin. Recommended Level for party in 1.0x mode at Expert is at least 195. The high level combination makes casting and ability usage at good levels, therefore making the fight a lot easier, unless you want to use stat stones to increase frequency/speed.
Attacks includes Fire Physical Breath, Earth Physical Ground Attack, Earth Element Physical Breath Attack, Versatile Magic Attacks, and random melee attacks that include single target and 3x3 and 5x5 abilities that reduce FS from any of the part (Character dies when FS is at 0). Boss abilities contain bad effects that ultimately hurt; ranging from losing FS/HP, reducing melee/casting speed times, and not allowing players to use TP abilities. It's like the perfect combination to put it in the hardest boss in the game. It's recommended to have 3 Supporting units that provides FS buff. The boss also has 決死5, which increases all his abilities under 50% health, meaning he takes a lot less damage. Stacking Piercing and additional attacks are mandatory.
To make matters worse, if one of the parts is defeated, the boss will revive them, though it is a lot less frequent than the third Arena boss. Out of all the parts, the Teeth (anti-versatile element) is by far the most annoying. My setup consists of the picture below and the teeth was the first to be taken down, followed by the eye (Because it's beside it). The reason the teeth is annoying is because of its 5x5 Physical Earth Breath ability. That is why Celica's element is Earth, but sometimes, it registers as a physical ability, so it just kills him. It's weird.
My setup is below and the only mistake I made was not having Cowra use her 'Ice' sword, so the Teeth dropped slower. Versatile/Holy weapons work best against all the other parts along with the boss as they are a Majin defense element. Once you are down to either one part or 0, it's best time to buff your characters up from Shuri, so they can deal with the damage reduction from the innate 決死5 ability that the boss possesses. Shuri is Fire element because the boss does a Fire Element Breath. Both Celica and Shuri have the ability 'Flying' so they can negate the Physical Earth 5x5 Ability. Refin is stacked with full defense; Celica/Shuri are supporters; Cowra/Eushully are stacked more on the offense side. The way the composition is setup, there are still 4 attackers in this fight. All shield wielders are immune to Penetration as the Teeth's breath, if it penetrates, will slaughter the entire party (At least my entire party).
Boss was attempted ranging from level 160 and onwards, but with no success due to low defense/frequency and slow speed.
Side note: 2.0 armor and weapons are almost useless, except for Eushully chan's Ice Weapon, which sucks!
Main Boss
- 10 second cast / 4 second delay: 3x3 Physical Attack
- 4 second cast / 4 second delay: 1x1 Physical Attack
- 6 second cast / 12 second delay: 5x5 Fire Magic Breath (Causes Burn Debuff)
- 6 second cast / 3 second delay: 5x5 Earth Physical Attack (Flying units are immune)
- 10 second cast / 8 second delay: Heal a target for ~7k
- 10 second cast / 5 second delay: Revive a single decapitated part
Wing
- 5 second cast / 6 second delay : 1x3 Versatile Magic Attack
- 5 second cast / 4 second delay: 1x1 Physical Attack
- 5 second cast / 4 second delay: 3x3 Physical Attack (Looks like Magic)
- 5 second cast / 4 second delay: AOE FS Reduction (Causes confusion aka not being able to use TP abilities debuff )
- 6 second cast / 7 second delay: 5x5 Versatile Magic Damage
- 3 second cast / 6 second delay: 3x3 Lightning Magic Damage
Eye
- 6 second cast / 7 second delay: 1x3 Versatile Magic Attack
- 6 second cast / 7 second delay: 1x1 Fire Magic Attack
- 3 second cast / 1 second delay: 1x1 Lightning Magic Attack
- 6 second cast / 3 second delay: 1x1 Physical Attack
Teeth
- 6 second cast / 5 second delay: 1x1 Single Target Physical Attack
- 5 second cast / 3 second delay: AOE FS Reduction (Causes Slow casting/attack speed debuff)
- 10 second cast / 2 second delay: AOE FS Reduction
- 9 second cast / 8 second delay: 5x5 Earth Physical Breath (Causes Acid Debuff)


Video of this fight using a strategy approach of not killing the Teeth. Also works.

Dungeon Aruma[]
Speak to Amudoshias after beating the 5th battle (Which is mandatory). Shuverutoraite is back and now appears. After the dialogues take place, the new dungeon will now be available. It is located in the Arena by clicking on the black hole icon. Before entering the dungeon, grab all the quests from the bulletin board.
When entering the dungeon, after a quick dialogue, Shuverutoraite can be summoned.
In this dungeon, unlike the Ex-Dungeon, no enemies will appear if the random encounter is disabled. It's recommended to actively engage in battles as there are a lot of summoning stones to be collected here. Not only they provide a lot of experience, the drops reward good money. As a bonus, there are also very cool looking Natsu units. Also, the Goddess Gauge will be drained quickly in this dungeon.
Move into the dungeon, grab the chest on the lower right of the map. Head right to the Red Teleporter. Once upon entering the red teleporter, you will be ported back to the entrance, but a message pop-up will indicate there was a sound. Now, head to either one of the green teleporters, grab the chest, and then enter the room shrouded with dark mist. Enter to engage a fixed encounter that contains three consecutive battles.
Once the battle is over, grab the chest. Port out of the dungeon or walk back out and take the teleporter in front of the entrance.
After taking the teleporter, it is a room that contains a very basic puzzle that requires you to activate pillars and it alters the paths of where you walk. Further in, there will be an area that is covered by dark mist and cannot be accessed. Head out of the dungeon, go to the quest board, and grab the quest: 魂浄の宝珠. Head to the Alchemy room to forge this item. It requires: 浄化された水x20, 神陽魚x2, 光輝く木の実x10. All of these items can be purchased from Alicia's shop. Forge the item, and head back into the dungeon. You can also speak to Shuverutoraite for a quick dialogue.
Pass the area that was covered by dark mist, take the teleporter. Head up to grab the chest and then head down for the boss fight. Unlike a traditional normal boss fights, this time, you get to choose if you want to fight, kind of like the random Majin encounters.
Boss: Shuverutoraite
She has some strong innate skills, but overall, the fight is rather easy. Natsu combo trash mobs are harder than the boss. She has a Versatile and Holy attacks, but either take a long time to cast or is simply recoverable rather quickly. She only has 1 physical attack ability, which can easily be recovered. Because of this, it's not a hard fight and not a long one either regardless on what her stats indicate and her innate ability of being immune to Overkill. The difficulty is on par with the Silver Arena Battles. Her abilities:
- 14 second cast / 3 second delay: 1x1 Holy Magic Attack
- 14 second cast / 3 second delay: 3x3 Lightning Magic Attack
- 6 second cast / 7 second delay: 1x3 Versatile Magic Attack
- 5 second cast / 7 second delay: 5x5 Holy Magic that debuffs?
- 8 second cast / 6 second delay: 1x3 Physical Attack

Upon her defeat, her H-scene automatically triggers. Unlike the Arena battles, you can no longer fight against her again.
Difficulty on Boss[]
Basing on personal experience in order
Arena Battle #: 15 > 3 > 4 > 14 > 13 > 12 > [Any Boss except for 11, 9, 1] > 11 > 9 > 1.
All bosses were attempted between level 80-125 except Arena #15, which I needed 165 175+ under 1.0X, Expert difficulty.
5.0x Difficulty[]
As Eushully claims, anything 1.0X or higher is not supported. Playing higher difficulty is up the player's discretion. Handling higher difficulty is just a massive gear check. The concept of the fights are identical and remains unchanged. The stat stones are definitely required. But whether or not people want to continuous farming to obtain this is a different story as it is rather a ridiculous amount of farming. With the way this system is designed, it strongly encourages cheating as simply the time invested to grind the items legitimately takes excessively too long. VERITA at least did not require through the use of the stats stone in order to be conquered in 5.X.
Farming Gold Stones to upgrade 'Contract Stone': Arena Battle #9. It drops a Gold Stone (M Rank) everytime. The downside is that there are no money drops.
Farming Money: The 2.0 dungeon from the armor that drops off from different color of Natsu. They sell for a good amount of money. 5.0x Difficulty pre 2.0 Content: Stack Avoidance
5.0x Difficulty Post 2.0 content: Strategies all apply from the guide above. You just need the numbers to survive the hits. Nothing really changes.
| La DEA of Libra (Detailed Walkthrough) | ||
|---|---|---|
| <<<Previous |
Part 1 Part 2 Part 3 Part 4 Part 5 Part 6 Part 7 Part 8 Part 9 Part 10 |
Next>>> |
| Stray Demons(Majin) | Extra Events(EX) | Version 2.0 | ||